Today, we demand increasingly fast WiFi speeds at a greater range than we ever needed in the past. This is largely due to the increase in popularity of activities like hi-definition streaming, gaming, or hefty file transfers. Going back 20 years, you may have been satisfied having a “computer room”, but today, every room is a computer room. We not only expect to be connected to WiFi in every room, but we expect to receive a consistent performance no matter where we go in our homes. The key to getting this consistent WiFi experience is extending the WiFi coverage in your home.
If you want to extend your WiFi coverage, there are a range of options available to you.
Use a WiFi Heatmapper
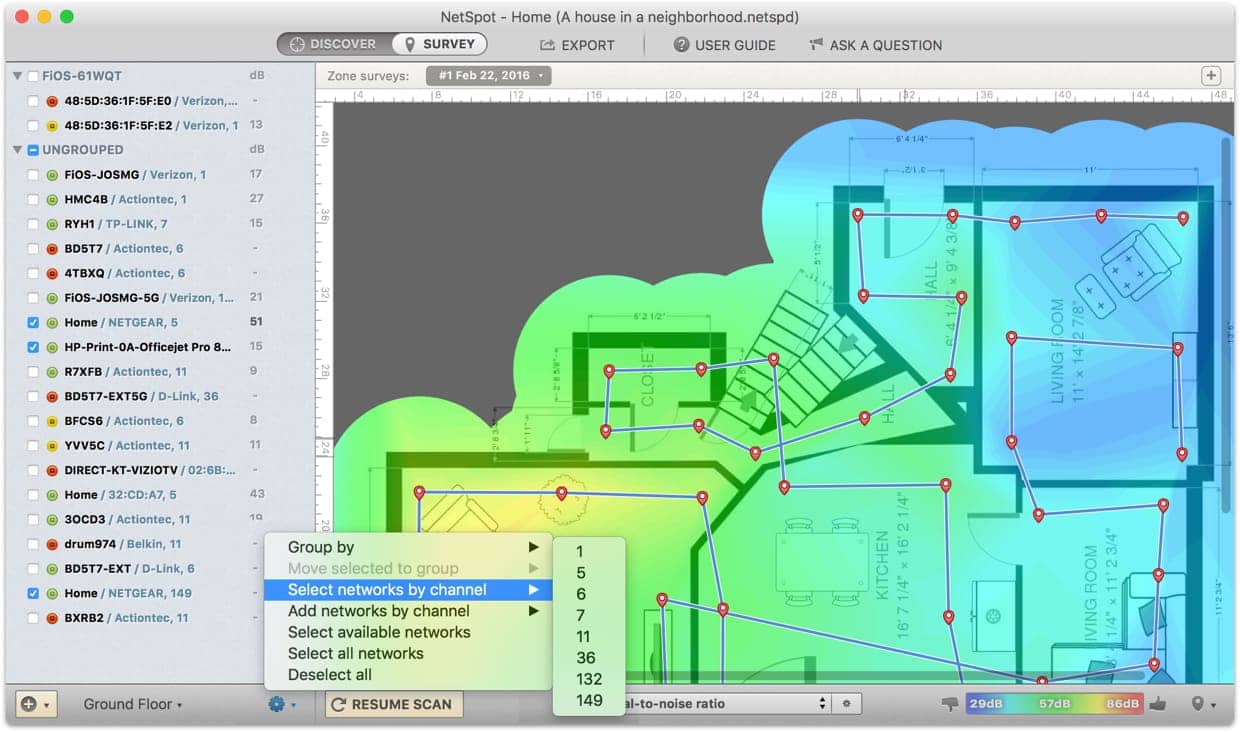
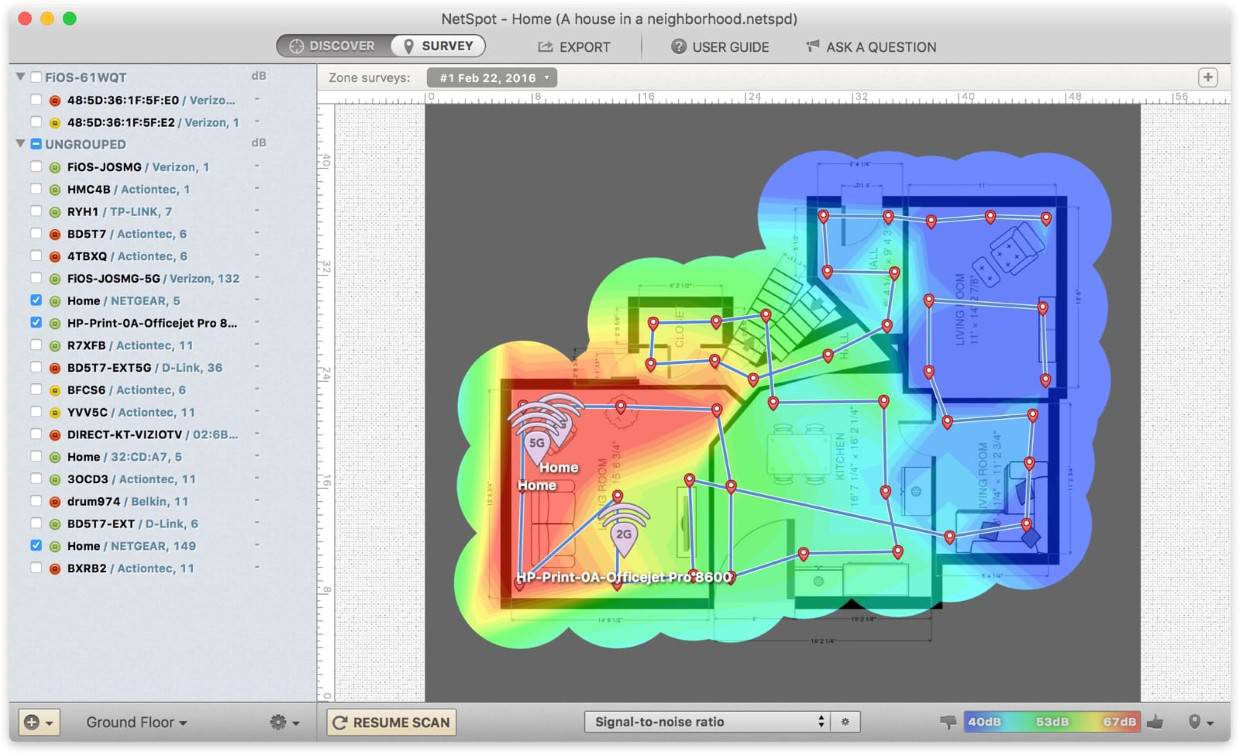
The first step in extending your WiFi coverage is to determine the current health of your wireless network. A WiFi heatmapper can help you visualize the health of your network by clearly displaying which averages have good WiFi coverage and which has poor WiFi coverage. A WiFi heatmap will use a color-coded system where the gradient (or “heat”) of the color will shift to represent changes in signal strength. With the NetSpot heatmapper app, red represents the strongest signal, and blue represents the weakest signal.
Install a Range Extender
A WiFi extender works by receiving a WiFi signal from the router and re-sending it to further the range. For example, let’s say that your router is located on the bottom floor of your home, in the kitchen. You have a home cinema on the 3rd floor of your home, and you’d like to stream high-definition video in this room. However, the signal strength is too weak to be useful on the 3rd floor. You can place an extender on the second floor, and this will act as a middleman, re-distributing the signal towards the 3rd floor.
Focusing WiFi Signal
If your main aim is just to get a better signal in a particular room furthest away from the router, then you could opt to focus your WiFi signal in this direction. Most WiFi routers are omnidirectional, meaning they transmit radio waves in all directions equally. This is one of the reasons that placing your router in a central location is so important.
To focus your WiFi signal, you need something called a patch antenna. Patch antennas are more common in commercial properties, but there’s no reason you can’t have one in your home if you think you’d benefit from it. Focusing the signal can help extend range because, generally speaking, in a traditional WiFi environment, the further away from the router, the slower the waves will travel. This is because faster speeds are the result of more complex wave modulation and therefore more prone to error the longer they travel. Focusing the signal in one direction towards the receiver helps address interference issues and allows for higher speeds.
Eliminate Interference
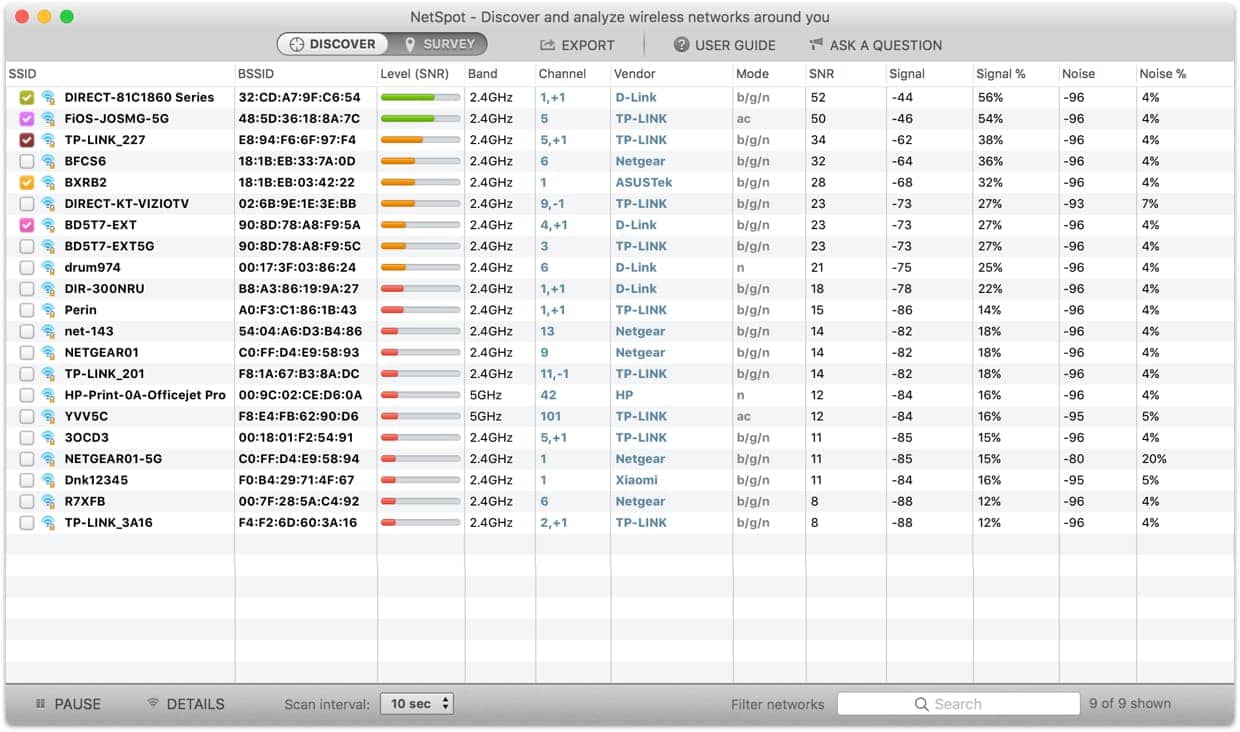
Ensure that your WiFi coverage isn’t being limited by the range of devices in your home that operate on a similar frequency. Baby monitors, microwaves, and wireless security systems, among other things, can interfere with your WiFi. The more interference and noise your signal have to pass through, the weaker and less reliable it will be on the other end.
How to Use a WiFi Heatmapper
For our how-to guide on how to use a WiFi heatmapper, we will be using the NetSpot app. NetSpot is very popular and is widely considered to be the best WiFi heatmapper on the market. Here’s how you generate a WiFi heatmap with NetSpot to improve your WiFi coverage.
- Install and Launch the App
- Getting started – Switch to survey mode and select “Start a new survey”. You will now follow instructions to name your project, choose your area type, and regulate the precision radius.
- Upload or Create a Map – To get accurate results for your WiFi heatmap, you will need to upload a map of your home. If you don’t already have a map, you can create one within the app using the “Draw it” feature.
- Start Heatmapping – The WiFi heatmap process has now begun, and you will need to carry your device around your home. You will be able to see the areas you have already covered, as well as any areas you are yet to cover. The best method for ensuring even coverage is to move in a zig-zag pattern.
- Analyze the results – Once you have covered all areas, you can click the “Stop can” button. You will now have a heatmap that you can use to inform your WiFi boosting decisions.


