

Best Mechanical Keyboards 2026: 13 Steps, 45 Min

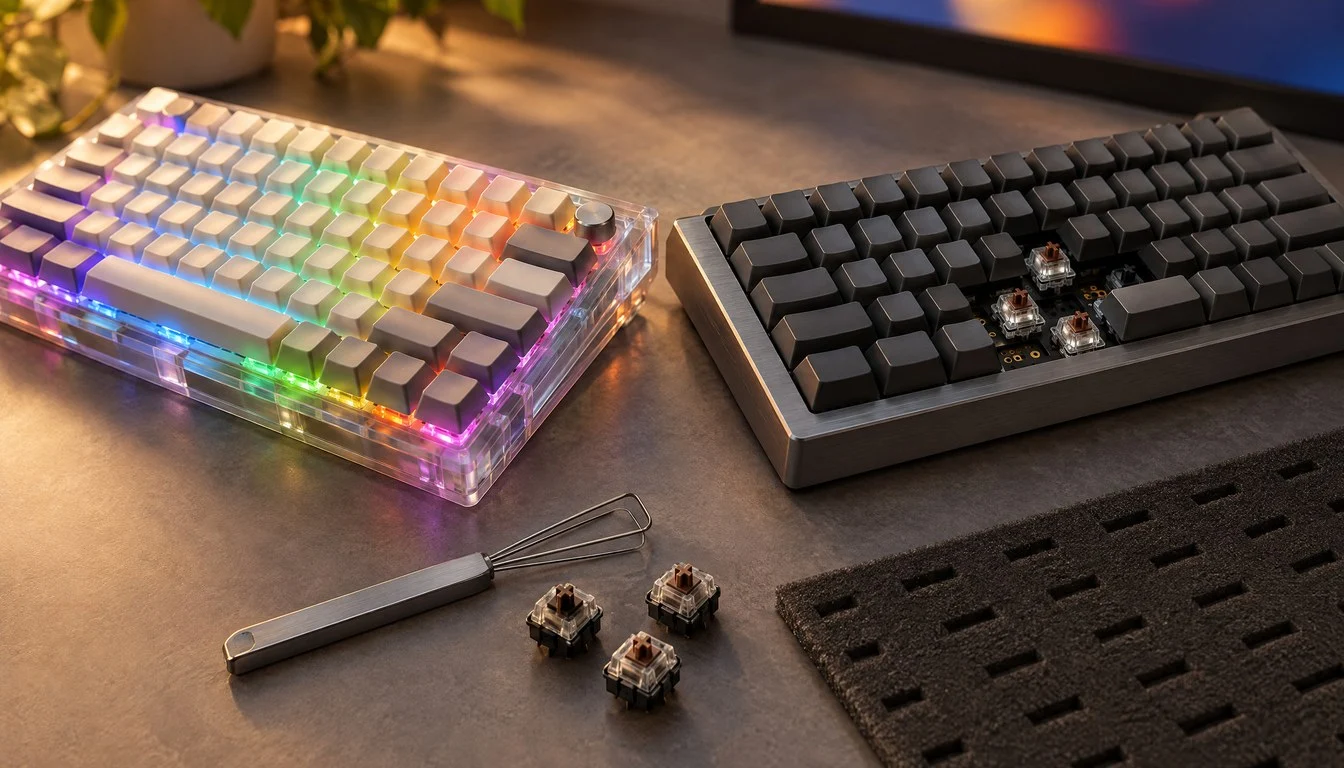
Picking a mechanical keyboard in October 2026 means wading through a market that has quietly split in two. On one side sit the traditional switch boards that defined the hobby for the last decade. On the other sit magnetic Hall-effect keyboards, which started as a niche gaming category and have since spread into general-purpose typing boards from Keychron, Akko, and Royal Kludge. If you have not shopped for a keyboard since 2023 or earlier, the landscape you remember no longer matches what is actually on shelves.
This tutorial walks through the entire process: figuring out which layout and switch type actually fits how you type or game, buying the right board and parts, building or customizing it, flashing firmware with QMK and VIA, and tuning a Hall-effect board’s actuation settings for competitive play. By the end you will have a working, fully configured keyboard and a documented backup of its firmware, not just a shopping list.
Don't miss new tech stories on Google
Add TrendinTech once in the Google app and our stories appear in your news suggestions.
Why mechanical keyboards still matter in 2026
Daniel Guermeur, founder and CEO of Metadot and the man behind Das Keyboard, has described the entire modern mechanical keyboard revival as a reaction against cheap membrane boards. “The mechanical keyboard was revived partially because of me trying to find very good quality keyboards, and I could not find them because the keyboards at the time were super-cheap, membrane keyboards. I had to go back to the ’80s to look at the IBM Model M, and brands that used Cherry [key] switches. I said, ‘That’s what I need in my keyboard,'” he told PCMag. That origin story still explains why the category exists at all: people noticed their keyboard is the one object they physically touch more than almost anything else they own.
Guermeur made a related point about why the hobby keeps growing instead of plateauing. “People are realizing that it’s important to have a good keyboard. The way they realize this is when looking at other people’s keyboards. They say, ‘Wow, that’s cool,’ and then they try it and say, ‘Wow, it’s actually very comfortable.’ The keyboard is the object we touch the most in our lives,” he said in the same interview. That social, visible quality is part of why custom keycap sets, gasket-mounted cases, and sound-dampening foam have become normal features on mass-market boards instead of enthusiast-only mods.
The practical reason to care in late 2026 specifically is that the hardware underneath has changed. Hall-effect magnetic switches, which read key position continuously instead of firing a single digital signal, have moved from Wooting’s niche gaming boards into mainstream 75% and 96% keyboards from Keychron, Akko, and Royal Kludge, often at the same price as a traditional hot-swappable board. That means the “best mechanical keyboard” question now has two correct answers depending on what you’re optimizing for, and this guide treats both.
Prerequisites and what you’ll need
You do not need to be a hobbyist to follow this tutorial, but you do need a short shopping list and a couple of free tools installed before Step 1. Here is exactly what to have ready:
- A budget bracket in mind: sub-$80, $80-$150, or $150+ (this guide covers boards in all three)
- A USB-C cable (most 2026 boards ship with one, but a 2m braided replacement is worth owning)
- A Windows, macOS, or Linux machine with a Chromium-based browser (Chrome, Edge, or Brave) for web-based flashing tools — Chrome/Edge 120+
- VIA desktop app or web app — version 3.x, free, at caniusevia.com
- QMK Toolbox — version 0.3.x — only needed if you flash custom firmware rather than using a pre-flashed VIA-compatible board
- A keycap puller and switch puller if you plan to hot-swap switches (usually bundled free with hot-swap boards)
- 15-45 minutes of uninterrupted time, depending on whether you’re buying pre-built or doing a hot-swap build
One more thing worth confirming before you buy anything: check whether your operating system needs a driver. Akko, Royal Kludge, and NuPhy boards work out of the box on Windows and macOS without installing anything, but their RGB and macro customization tools (Akko Cloud Driver, RK Driver, NuPhy driver) are Windows/macOS only as of this writing. Linux users should lean toward VIA/QMK-compatible boards like the Keychron Q-series or Wooting line, since those are configured entirely through a browser-based or open-source app that works identically across operating systems.
Step 1: Decide between a traditional switch board and a Hall-effect board
This is the single decision that determines everything else about your build, so make it first. Traditional mechanical switches (Cherry MX-style, Gateron, Akko’s own switch lines) are binary: they register a keypress once you cross a fixed actuation point, typically 2.0mm of travel. Hall-effect, or magnetic, switches use a magnet and sensor to track the exact position of the stem continuously, which means the keyboard’s firmware — not the switch itself — decides when a press “counts.”
That difference sounds academic until you see what it enables. Hall-effect boards let you set a custom actuation point anywhere from roughly 0.1mm to 4.0mm of travel, and most also support rapid trigger, where the key re-actuates the instant you let off pressure rather than waiting for a full release. That’s a meaningful edge in competitive shooters and rhythm games, which is why the category started with gaming-first brands like Wooting before spreading into general keyboards.
The tradeoffs run the other way for typing feel and repairability. Traditional mechanical switches come in thousands of spring weights, stem shapes, and factory-lubed variants, and a dead switch costs a couple of dollars to hot-swap. Hall-effect switches are a newer, smaller ecosystem, so you have fewer third-party options if you want to experiment beyond what the keyboard maker sells. If you mostly type documents and code, and rarely play twitch-reflex games, a traditional hot-swappable board is still the simpler, cheaper, more flexible choice. If you play competitive shooters or just want adjustable actuation as a long-term feature, a Hall-effect board earns its usual $20-$40 price premium over an equivalent traditional board.
Step 2: Pick a layout that matches your desk and workflow
Layout size is the second-biggest decision, and it’s one people get wrong by defaulting to whatever their last keyboard was. The common sizes you’ll see in 2026 listings are 60%, 65%, 75%, tenkeyless (TKL, about 87%), 96%, and full-size (100%). Each percentage roughly describes how much of a full-size layout’s keys it keeps.
A 60% board drops the function row, arrow keys, and numpad, relying on key combinations (Fn+number for F-keys, for example) to recover that functionality. It’s the smallest footprint and the easiest to travel with, but it has a real learning curve if you use F-keys or arrow keys constantly. A 65% board adds dedicated arrow keys and a few navigation keys while staying compact. A 75% board — probably the most popular size in 2026 releases, including the Akko 5075B Plus and NuPhy Air75 V2 — keeps the function row and arrow cluster in a tightly packed layout, which is the sweet spot for most programmers and writers. TKL drops only the numpad, and 96% or 1800-compact layouts (like the Glorious GMMK Eternal) squeeze a numpad back in without the full width of a 100% board. If you do spreadsheet work or numeric data entry regularly, don’t fight this: get a 96% or full-size board and save yourself the annoyance of hunting for an external numpad later.
Step 3: Shortlist boards by use case and budget
Rather than picking one “best” keyboard, use the table below to shortlist two or three candidates that match your layout and switch-type decisions from Steps 1 and 2. These are current, actively sold models as of October 2026, not discontinued previous-generation boards.
| Model | Layout | Switch type | Price (USD) | Best for |
|---|---|---|---|---|
| Keychron Q6 Ultra 8K | Full-size | Hot-swap mechanical | ~$220-$250 | Premium typing + light gaming, RTINGS’ current top overall pick |
| Keychron K4 HE | TKL | Hall-effect (Lime switches, N-pole support) | $134.99 | Budget-friendly Hall-effect for typing and gaming |
| Keychron K10 HE Special Edition | TKL/96% | Hall-effect | $144.99 | Wider magnetic-switch compatibility, office + gaming hybrid |
| Wooting 80HE+ | TKL | Hall-effect (Lekker Tikken Medium) | Check wooting.io for current pricing | Competitive gaming, 8kHz polling, integrated knob |
| Glorious GMMK Eternal | 96%/1800 | Mechanical (Fox linear, MX 5-pin/3-pin compatible) | Check glorious brand pricing | Numpad users who still want hot-swap flexibility |
| Akko 5075B Plus | 75% | Mechanical, pre-lubed, gasket-mounted | $69.99 | Best budget typing feel, tri-mode wireless |
| Akko 3061S HE Shine-Through | 60% | Hall-effect | $99.99 | Compact Hall-effect with 8kHz polling on a budget |
| Royal Kludge RK84 Pro | 75% | Mechanical, tri-mode | $59.99 | Cheapest VIA-compatible wireless board |
| Royal Kludge C98 HE | 96% | Hall-effect | ~$79.99 | Cheapest numpad Hall-effect option |
| NuPhy Air60 HE | 60% | Low-profile Hall-effect | $119.95 | Thin-profile desks, laptop-style feel with gaming features |
| NuPhy Air75 V2 | 75% | Low-profile mechanical | ~$99 | Low-profile typing without Hall-effect premium |
| EPOMAKER HE68 Lite | 65% | Hall-effect | ~$42 | Absolute cheapest entry into Hall-effect switches |
| EPOMAKER TH80 V2 Pro | 75% | Mechanical, Sea Salt Silent switches | $71.99 (sale) | Quiet office use, open-plan workspaces |
RTINGS updated its top overall recommendation in late September 2026, moving from the Keychron Q5 Max to the newer Keychron Q6 Ultra 8K as its best mechanical keyboard pick, according to the publication’s best mechanical keyboards rankings. That’s a useful signal if you want a single “don’t overthink it” purchase, but the table above is built to help you find the cheaper or more specialized board that actually fits your layout and switch preference instead.
Step 4: Understand hot-swap sockets before you buy switches separately
If you’re buying a hot-swappable board, don’t assume every switch on the market will drop in. Hot-swap sockets come in two common pin configurations: 5-pin and 3-pin. A 5-pin socket has two extra plastic support pins on either side of the switch’s three electrical legs, which gives the switch more lateral stability in the plate. A 3-pin socket only takes the three electrical legs, meaning a 5-pin switch needs its two outer plastic pins clipped off with flush cutters before it will seat.
The GMMK Eternal, for example, is explicitly compatible with both standard 5-pin and 3-pin MX-style switches out of the box, which is a selling point worth checking for on any board you’re considering if you plan to swap switches later. Hall-effect boards complicate this further: because the switch itself contains the magnet, you generally cannot mix a traditional mechanical switch into a Hall-effect hot-swap socket and expect adjustable actuation to work, even if it physically fits. Always check the manufacturer’s switch compatibility list (Keychron explicitly lists Lime switches and broader N-pole compatibility on its newer K4 HE and K10 HE boards) before ordering aftermarket switches.
Step 5: Choose your switch feel — linear, tactile, or clicky
Once you know your hot-swap pin type (or have picked a pre-built switch option), the next decision is feel. Linear switches move straight down with no bump and no click, giving a smooth, consistent keystroke that’s popular for gaming because nothing interrupts the travel. The GMMK Eternal’s stock Fox linear switches are a good example, rated for 50 million actuations at a 50-60 gram-force actuation weight, which is a fairly light, fast-feeling spring.
Tactile switches add a small bump partway through the keystroke that you feel but don’t hear as a distinct click, giving feedback that you’ve actuated the key without the noise of a clicky switch. This is the common middle-ground choice for office environments where you want confirmation you pressed a key but don’t want to annoy desk neighbors. Clicky switches add both the tactile bump and an audible click, which a lot of hobbyists love for the sound alone, but it’s a genuinely bad choice for shared offices or video calls — if you’re set on clicky switches, consider a silent-switch alternative like EPOMAKER’s Sea Salt Silent switches on the TH80 V2 Pro, which keep some tactile feedback while cutting the noise.
Step 6: Unbox and do a first power-on check
Before you touch any software, do a basic physical check. Plug the board in with the included USB-C cable (not a third-party cable you have lying around, at least for this first test, in case of a cable fault) and confirm every key registers in a plain text editor. Type a full line of every letter, number, and symbol, then test modifier combinations like Shift, Ctrl, and Alt with a few keys held down simultaneously. This catches dead switches or soldering defects before you’ve done any customization, which makes a warranty return far less of a headache.
If you bought a tri-mode board (USB-C, 2.4GHz wireless dongle, and Bluetooth, like the Akko 5075B Plus or Royal Kludge RK84 Pro), test all three connection modes separately before relying on any of them for daily use. Wireless dongles in particular can ship with a firmware mismatch that a connection reset or driver update fixes, and you want to find that out on day one, not during a video call three weeks later.
Step 7: Install VIA and load your keyboard’s definition file
VIA is the open-source configuration standard most hot-swap and Hall-effect enthusiast boards support, including Keychron’s Q and K-HE lines and Wooting’s boards. Download the desktop app from caniusevia.com, install it, and plug your keyboard in. Most VIA-compatible boards are auto-detected; if yours isn’t listed, you may need to load a JSON definition file from the manufacturer’s support page first, through VIA’s “Design” tab.
# Typical VIA setup sequence on a fresh hot-swap board
1. Install VIA desktop app (caniusevia.com) - v3.x
2. Connect keyboard via USB-C directly to your machine (not through a USB hub)
3. Open VIA -> it should auto-detect and show your keyboard's layout
4. If not detected: Design tab -> Import -> load the .json definition
   from your keyboard manufacturer's firmware/support page
5. Click "Configure" to begin remapping keys and layers
Once VIA recognizes the board, click into the “Configure” tab. You’ll see a visual map of every key. Click any key on the diagram, then click a new key function from the panel to remap it — a common first move is swapping Caps Lock for a second Ctrl or Escape key, which costs nothing and meaningfully speeds up both command-line and vim-style workflows.
Step 8: Set up layers for macros and media controls
Layers let one physical key send different signals depending on whether a layer-shift key (usually labeled Fn) is held. This is how a 60% or 65% board recovers function keys, arrow keys, and media controls without dedicating physical keys to them. In VIA’s Configure tab, use the numbered tabs above the keyboard diagram (Layer 0, Layer 1, Layer 2, and so on) to assign different behavior to the same physical key across layers.
A practical example: on Layer 0, the key in the top-right corner might be Delete. On Layer 1 (accessed by holding Fn), remap that same key to Mute, and the keys around it to Volume Up/Down. This single change turns a cramped 60% board’s missing media row into a one-key-hold shortcut, and it only takes about two minutes once you understand the layer tabs.
Step 9: Flash custom QMK firmware (advanced, optional)
VIA covers remapping and macros for most users, but if you want fully custom key behavior — tap-dance keys that do one thing on a quick tap and another on a hold, custom RGB animations, or combo keys — you’ll need QMK, the open-source firmware VIA is built on top of. This step is optional and only necessary if your board ships with QMK-compatible firmware (most Keychron Q and V series boards do; check your specific model’s firmware repository before attempting this).
# Flashing custom QMK firmware with QMK Toolbox (v0.3.x)
1. Clone or download your keyboard's QMK firmware folder from
   github.com/qmk/qmk_firmware/tree/master/keyboards/<your_board>
2. Install QMK MSYS (Windows) or the QMK CLI (macOS/Linux)
3. Build the firmware:
   qmk compile -kb <your_board> -km via
4. Open QMK Toolbox, select the compiled .hex or .bin file
5. Put the keyboard into bootloader mode (usually a key combo like
   holding Esc while plugging in, or a reset button on the PCB)
6. Click "Flash" in QMK Toolbox and wait for the confirmation message
7. Re-open VIA to confirm the board is still detected and configurable
Flashing the wrong firmware file, or flashing while not in bootloader mode, is the single most common way people brick a board during this step — always double check you’ve selected the exact file matching your board’s exact revision before clicking flash.
Step 10: Tune actuation point and rapid trigger on a Hall-effect board
This step only applies if you bought a Hall-effect board (Wooting 80HE+, Keychron K4 HE/K10 HE, Akko 3061S HE, Royal Kludge C98 HE, NuPhy Air60 HE, or EPOMAKER HE68 Lite). Open the manufacturer’s configuration app — Wootility for Wooting boards, VIA for Keychron’s HE line, or the brand’s own driver for Akko/Royal Kludge/NuPhy/EPOMAKER — and look for an “Actuation” or “Performance” tab.
Set the actuation point first. A shallower actuation point (around 0.5-1.0mm) makes keys register faster with less physical travel, which favors competitive gaming but increases the chance of accidental presses if you rest your fingers on the keys. A deeper point (1.5-2.0mm) behaves closer to a traditional mechanical switch and is the safer default for typing-heavy work. Then enable rapid trigger if your board supports it — this makes a key re-actuate the moment you release pressure by a small amount, rather than waiting for a full key-up, which is primarily useful for games with fast directional input like competitive shooters. Leave rapid trigger off for general typing; it has no benefit there and can occasionally cause duplicate characters if your typing rhythm is uneven.
# Example actuation profile for a Hall-effect 75% board
Profile: "Typing"
  actuation_point: 1.8mm
  rapid_trigger: off

Profile: "Competitive FPS"
  actuation_point: 0.6mm
  rapid_trigger: on
  rapid_trigger_sensitivity: 0.2mm
Most Hall-effect boards let you save multiple profiles and switch between them with a key combo or the configuration app, so you don’t have to manually re-tune settings every time you switch from writing code to playing a game.
Step 11: Check polling rate and whether it actually matters for you
Several 2026 boards, including the Wooting 80HE+ and the Akko 3061S HE Shine-Through, advertise 8kHz polling rate, meaning the keyboard can report its state to your computer up to 8,000 times per second rather than the old USB standard of 1,000Hz (1kHz). In practice, this only produces a noticeable difference in very high-refresh-rate competitive gaming setups, and only if your monitor, GPU, and game engine can all keep pace. For general typing, coding, or even most single-player gaming, 1kHz polling is functionally indistinguishable from 8kHz. Don’t pay a premium for 8kHz polling unless you specifically play competitive, high-refresh-rate shooters — it’s a real feature, just a narrow one.
Step 12: Build a sound and feel profile with foam and keycaps
If you want to improve a board beyond its stock feel without buying new switches, foam and keycaps are the cheapest upgrade path. Many current boards, including the Akko 5075B Plus, ship with three layers of sound-dampening foam and a gasket-mounted plate design already, which produces a deeper, less hollow sound than older rigid-mount boards. If your board didn’t come with foam, adding a thin layer of PE foam or Sorbothane between the PCB and case is a common and reversible mod that reduces hollow rattle.
Keycap material also changes both feel and sound. Double-shot PBT keycaps, standard on boards like the Akko 5075B Plus, resist shine and wear far better than cheaper ABS keycaps and tend to produce a slightly deeper, less clacky sound. If you’re building rather than buying pre-built, confirm your keycap set matches your board’s physical profile (most use Cherry or OEM profile) and that the stabilizers under your longer keys (space bar, shift, enter) are lubricated — unlubricated stabilizers are the single most common cause of a rattly-feeling budget board.
Step 13: Back up your configuration
Once your layers, macros, and (if applicable) actuation profiles are set up the way you want, back them up. In VIA, use the “Save” icon in the top bar to export your current layout as a JSON file, and store it somewhere outside the keyboard itself — a cloud drive or a notes app works fine. If you flashed custom QMK firmware, keep the compiled .hex/.bin file and your keymap.c source file together in version control (even a simple personal GitHub repo works) so a firmware reset, OS reinstall, or board swap doesn’t force you to redo every remap from memory.
Common pitfalls to avoid
- Buying a 5-pin-only hot-swap board and then ordering 3-pin switches, or vice versa, without checking compatibility first — always confirm the socket type before buying aftermarket switches.
- Assuming a traditional mechanical switch will work in a Hall-effect hot-swap socket just because it physically fits — magnetic-switch boards need magnetic switches to read actuation correctly.
- Setting rapid trigger on for everyday typing, which can cause duplicate or missed characters if your typing cadence is uneven — reserve it for gaming profiles.
- Flashing QMK firmware without putting the board into bootloader mode first — this is the most common cause of a “bricked” keyboard that just needs a proper reset, not a new board.
- Ignoring stabilizer lubrication on a budget board and blaming the switches for a rattly, hollow sound that’s actually coming from the space bar and shift stabilizers.
- Choosing a 60% layout for data-entry-heavy work and fighting the missing numpad every day instead of just buying a 96% or full-size board from the start.
- Connecting over a 2.4GHz wireless dongle through a USB hub instead of directly into the motherboard’s rear I/O, which can introduce input lag or dropped connections.
- Skipping the first-boot full-keyboard test and discovering a dead key weeks later, after the return window has closed.
Troubleshooting guide
Keyboard isn’t detected by VIA. Confirm you’re plugged directly into a USB port, not through a hub or docking station, and that the board’s firmware is actually VIA-enabled (not every board with hot-swap sockets supports VIA). Try a different USB-C cable — some cables are charge-only and don’t carry data.
A single key doesn’t register at all. Remove the keycap and check the switch is fully seated in its socket; hot-swap switches can work loose in shipping. If reseating doesn’t fix it, swap that switch with a known-working one from elsewhere on the board to isolate whether the switch or the socket/PCB is faulty.
Ghosting or multiple keys trigger from one press. This usually points to a stuck or debris-filled switch rather than a firmware issue. Compressed air under the keycap, or a full switch swap if that doesn’t help, resolves most cases.
Rapid trigger causes duplicate characters while typing. Lower the rapid trigger sensitivity value, or disable rapid trigger entirely on your typing profile — this setting is designed for gaming input patterns, not sustained prose typing.
Bluetooth or 2.4GHz connection keeps dropping. Move the USB dongle receiver closer to the keyboard, check for other 2.4GHz devices (routers, other wireless peripherals) causing interference, and confirm the board’s battery isn’t critically low, since some boards throttle wireless performance near empty.
QMK compile fails with a missing keyboard folder error. Confirm you cloned the correct, current qmk_firmware repository and that your board’s folder name exactly matches the keyboard and revision you own — manufacturers sometimes rename folders between hardware revisions.
Board bricks after a failed flash attempt. Most boards have a hardware reset button or a key-held-while-plugging-in combo that forces bootloader mode even after a bad flash. Check your specific board’s documentation for its reset procedure before assuming it’s permanently dead.
RGB lighting software (Akko Cloud Driver, RK Driver, NuPhy driver) won’t install on Linux. These first-party drivers are generally Windows/macOS only. VIA can still control basic lighting modes on boards with open firmware, but full effects and per-key RGB customization may require booting into Windows or macOS once for setup.
Board feels mushy or hollow despite being a “premium” model. Check whether foam was actually installed from the factory (some budget boards advertise foam but use a thin, ineffective layer) and whether your stabilizers are lubricated. This is a mechanical issue, not a software one, and no firmware update will fix it.
Keycaps don’t fit after buying a separate keycap set. Confirm your board uses a standard layout (ANSI vs ISO) and standard bottom-row spacing — some compact boards use non-standard spacebar and modifier widths that only fit keycap sets designed for that specific board.
Advanced tips once your board is dialed in
Once the basics are working, a few advanced moves get real daily value out of a VIA/QMK-capable board. Tap-dance keys — where one physical key does different things depending on tap count or hold duration — can replace two or three dedicated keys on a compact layout; a common setup is a single key that sends Escape on a single tap and toggles a layer on a double-tap. Combo keys, which trigger an action only when two specific keys are pressed simultaneously, are popular for things like triggering a custom macro without dedicating a key to it at all.
Chris Apple, an audio software engineer, described this kind of ongoing tuning as part of the appeal rather than a one-time setup chore. “This is the first mechanical keyboard I’ve owned, and I love tweaking my layout,” he said, discussing his experience customizing an ErgoDox EZ, according to a published equipment profile. He also noted a broader pattern among engineers who spend long hours typing: “I really love my split-hand Kinesis, and many of my friends (and fellow command line enthusiasts) love their mechanical keyboards.” If you spend six or more hours a day at a keyboard, treating the layout as a living configuration you revisit every few months, rather than a one-time setup, tends to pay off the most.
For Hall-effect boards specifically, experiment with per-key actuation rather than a single global setting if your configuration app supports it. Setting your WASD or movement keys to a very shallow actuation point for gaming while leaving your modifier keys (Shift, Ctrl, Alt) at a deeper point reduces accidental modifier presses while still getting the speed benefit where it matters.
Complete working project: a dual-profile 75% Hall-effect keyboard
To tie every step together, here’s a complete build using a Hall-effect 75% board (a Keychron K4 HE or similar), configured with two switchable profiles: one tuned for typing and one for gaming.
- Unbox and run the full-keyboard key test described in Step 6.
- Install VIA and confirm the board is detected (Step 7).
- Remap Caps Lock to Escape on Layer 0 for faster vim/terminal use.
- Set up Layer 1 (Fn-held) with media controls and F-keys, as described in Step 8.
- Open the actuation tab and create a “Typing” profile at 1.8mm actuation, rapid trigger off.
- Create a second “Gaming” profile at 0.6mm actuation, rapid trigger on, sensitivity 0.2mm.
- Bind profile switching to a key combo (commonly Fn + a number key) so you can swap profiles without opening the app.
- Install sound-dampening foam if it didn’t ship installed, and confirm stabilizers are lubricated.
- Export your VIA configuration as a JSON backup and store it in a cloud drive.
- Test both profiles for a full day each — one writing/coding day, one gaming session — and adjust the actuation points by 0.1-0.2mm increments if either feels off.
This setup costs roughly $135-$145 for the board itself, plus $0-$15 for any keycap or foam upgrades, and takes about 30-45 minutes from unboxing to a fully backed-up dual-profile configuration — well within the territory of a single evening project.
Output example: what a working VIA export looks like
When you export your configuration from VIA, you get a JSON file describing every layer and key assignment. A trimmed example of what that file structure looks like:
{
  "name": "My 75HE Config",
  "vendorProductId": 12345,
  "layers": 4,
  "keymap": [
    ["KC_ESC", "KC_1", "KC_2", "..."],
    ["KC_TAB", "KC_Q", "KC_W", "..."]
  ],
  "macros": [
    { "id": 0, "actions": ["Ctrl+Shift+Esc"] }
  ]
}
Keep this file. Re-importing it on a factory-reset board, or on a brand-new board of the same model, restores your entire layout in seconds instead of forcing you to rebuild every layer and macro from memory.
Hall-effect vs traditional mechanical: a quick-reference comparison
| Feature | Traditional mechanical | Hall-effect (magnetic) |
|---|---|---|
| Actuation point | Fixed, set by the switch (~2.0mm typical) | Adjustable, often 0.1mm-4.0mm |
| Rapid trigger support | Not possible | Supported on most models |
| Switch ecosystem size | Very large (thousands of variants) | Smaller, growing (Lime, Lekker Tikken, Fox and others) |
| Typical price premium | Baseline | +$20 to +$40 over an equivalent traditional board |
| Best for | Typing, programming, general use, repairability | Competitive gaming, rapid-input genres, adjustable feel |
| Polling rate ceiling seen in 2026 models | Usually 1kHz | Up to 8kHz on models like the Wooting 80HE+ |
Frequently asked questions
Do I need a Hall-effect keyboard if I don’t play competitive games?
No. Traditional hot-swappable mechanical switches cover typing, programming, and casual gaming perfectly well, and they’re generally cheaper with a larger switch ecosystem to experiment with later.
Can I put regular mechanical switches into a Hall-effect keyboard’s hot-swap sockets?
Usually not in a way that preserves adjustable actuation, since the actuation detection depends on the switch’s internal magnet. Check your specific board’s compatibility list before buying aftermarket switches.
Is 8kHz polling worth paying extra for?
Only if you play fast-paced competitive games at a high refresh rate on a capable monitor and GPU. For typing, coding, or most single-player gaming, 1kHz polling is not noticeably different.
What’s the difference between VIA and QMK?
QMK is the underlying open-source firmware; VIA is a graphical app that lets you configure QMK-based keyboards (remapping, macros, lighting) without writing or compiling any code. Most users only need VIA; QMK direct editing is for advanced customization VIA’s interface doesn’t expose.
Why does my budget keyboard sound hollow compared to reviews I’ve read?
Check whether sound-dampening foam is actually installed and whether the stabilizers under your space bar, shift, and enter keys are lubricated. These two factors affect sound more than the switches themselves in most budget boards.
Should I buy a 60% keyboard for programming?
Only if you’re comfortable relying on Fn-layer combinations for arrow keys and function keys. Many programmers prefer a 65% or 75% layout specifically because it keeps dedicated arrow keys without a large footprint.
Do wireless mechanical keyboards have noticeable input lag for gaming?
Modern tri-mode boards using a dedicated 2.4GHz dongle are generally fast enough for most gaming. Bluetooth tends to have slightly more latency than a 2.4GHz dongle or a wired USB-C connection, so competitive players typically default to wired or 2.4GHz.
How often should I back up my VIA configuration?
Any time you make a meaningful change to your layers, macros, or actuation profiles. It takes seconds to export a JSON file, and it’s the only thing standing between you and rebuilding your entire layout from memory after a factory reset or board swap.
Related Coverage
Owen Castellanos
Owen Castellanos is the Hardware & Gaming Reporter at TrendinTech, where he tests graphics cards, processors, consoles and peripherals and follows the games industry, from the major publishers to independent studios. He previously wrote reviews and benchmarks for Tom's Hardware and contributed features to PC Gamer, covering everything from laptop testing to the economics of game development. Owen holds a Bachelor of Science in Electrical Engineering from the University of Texas at Austin and attends CES in Las Vegas, Computex in Taipei and the Game Developers Conference in San Francisco each year to meet chipmakers and developers. He writes for readers who want to know whether a product is worth the money, and he is not shy about saying when it is not.
All stories by Owen Castellanos (284)![Gigabyte BIOS Hints at Intel 2027 CPUs With Dual RAM [2026]](https://trendintech.com/wp-content/uploads/2026/10/gigabyte-bios-update-intel-raptor-lake-next-2027-gen-640x360.webp)
![AMD Hikes GDDR6 Prices Oct. 1; Nvidia Holds on GDDR7 [2026]](https://trendintech.com/wp-content/uploads/2026/10/amd-gddr6-price-increase-nvidia-gddr7-2026-640x360.webp)
![Snapdragon X2 vs Core Ultra 3: 24% Faster, $600 Less [2026]](https://trendintech.com/wp-content/uploads/2026/10/snapdragon-x2-vs-intel-core-ultra-series-3-2026-gen-1-640x360.webp)